Docs
A plugin for developers to help you create documentation for your new plugins.
As an example the official Plugins 4D Documentation was created with this system.
Note: If you wish to run this plugin on an Apple silicon (ie an M1) based machine you will need to run C4D using Rosetta 2.
Menu
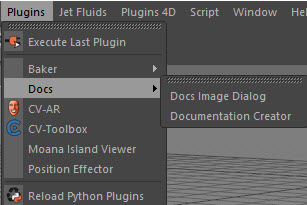
The Documentation Creator and Docs Image Dialog can be found under the Plugins Menu, and also the Plugins 4D menu (if you have the core plugin or are an existing Bundle owner).
Documentation Creator Features
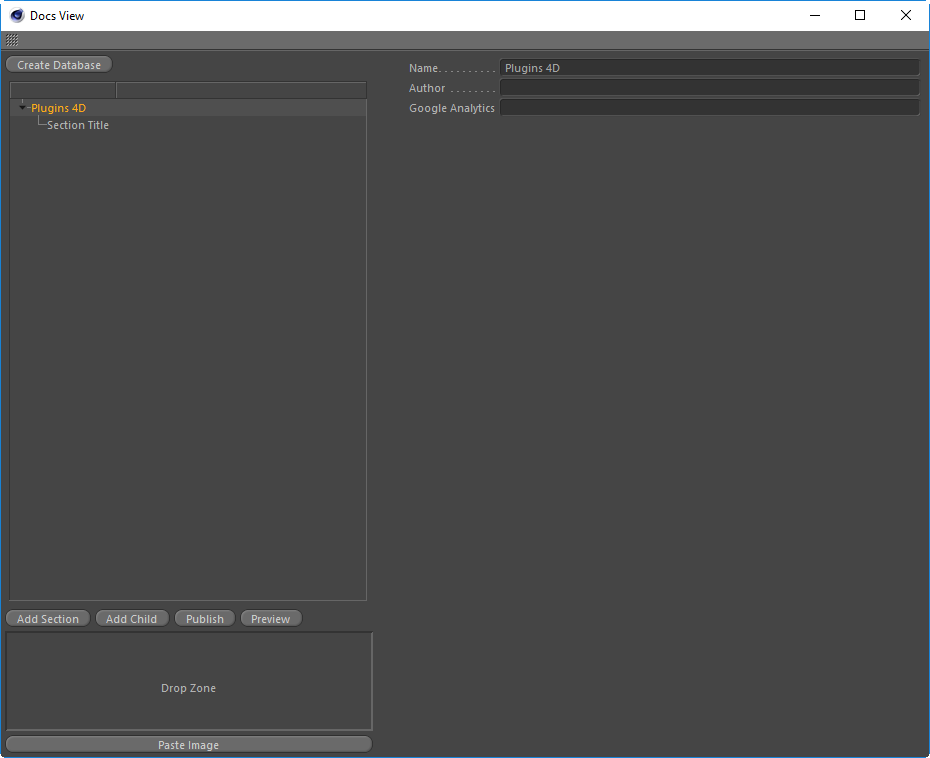
Create Database
First you must save a blank C4D scene. Next press the Create Database button to generate the sql database that lives next to the c4d file inside a Documentation folder. You only need to press this once the first time you wish to create documentation.
Add Section
Will add a new section directly beneath the currently selected one in the tree view.
Add Child
Will add a new section as a child of the currently selected one in the tree view.
Publich
Will publish out the html files to the documentation/published folder. The contents of this folder can then be directly uploaded to any web hosting service.
Preview
Will display the preview window in C4D. When you make changes to your section or titles you will need to click out of the section window before the preview window will refresh.
DropZone
Drag and drop any image from disk, or a command from the Customize Commands menu dialog in C4D. The image will be added to the documentation/images folder and a thumbnail is also created.
Afterwards in your section press “Ctrl+V” to paste the code to add the image or command icon to your section.
Paste Image
If you have copied an image into your clipboard from PhotoShop or another editor or screen capture program, then pressing this will save the file to the documentation/images folder and afterwards you can press “Ctrl+V” to paste the code into the section to add it to your page.
Root Node

When you have the top most root node selected you will see the above information
Name
This is the name that will be used as the title for your documentation when you publish.
Author
This is currently unused.
Google Analytics
Insert your Google Analytics tracking code if you wish to included the analytics in your published files. If you do not add a code then no analytics script will be added to the documentation.
Section Node
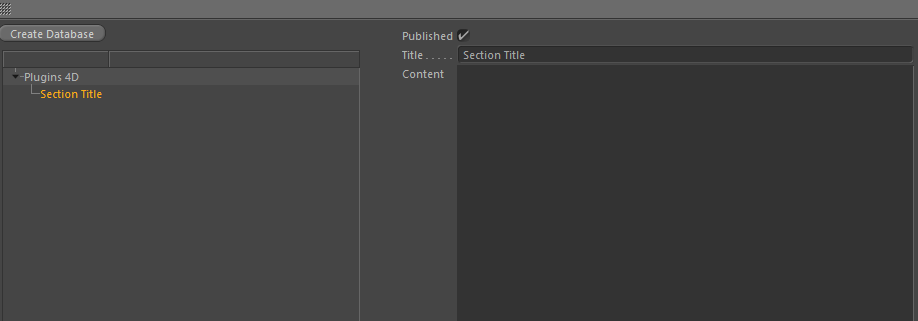
When you have the top most root node selected you will see the above information
Published
When checked it will publish out the HTML when you press publish.
Title
This will be the name of the page in the left hand menu when published as well as being displayed a the top of the page content as an H1 heading.
Content
This is the Markdown content for your page.
Docs Image Dialog
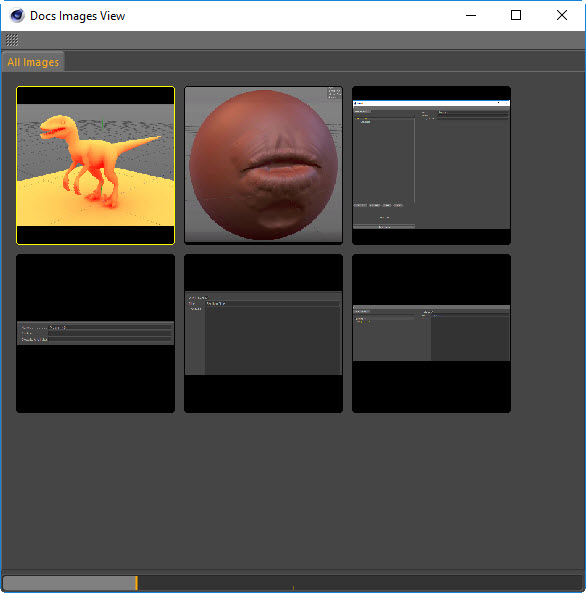
This dialog will contain all the images you have added to your docs system.
Selecting an image will add its ID to your clipboard. You can now Ctrl+V to paste the code into your section and the image will then be displayed and exported when published.
You can select individual, or multiple images, and choose to delete them via a right click menu.
Markdown
This plugin uses the Markdown language. For more information about what you can do with it please refer to the following documentation.
This Markdown implementation is based on the CPP-Markdown project on GitHub.